How To Integrate Myuser Into Salesforce
Connect Salesforce to Myuser in about 10 minutes with an External Client App - contacts, companies, deals, logged emails and meetings sync automatically.
In this blog post, we'll guide you step-by-step through integrating Salesforce using an External Client App - Salesforce's secure way to let a tool you trust talk to your CRM. This integration enables Myuser to automatically read and write lead information, log your outreach emails and booked meetings on each contact's timeline, and create deals - ensuring smoother and more efficient management of your outreach activities.
The whole setup takes about 10 minutes and you stay in full control: the app is created in YOUR Salesforce, with exactly the permissions you choose, and you can switch it off at any time.
Good to know before you start: API access is included in Salesforce Enterprise, Unlimited, Performance, and Developer editions. If you're on Professional edition, ask your Salesforce Account Executive to add the "Web Services API" add-on first.
Step 1: Open Setup
Log in to Salesforce as an administrator. Click the gear icon in the top right corner and select Setup.
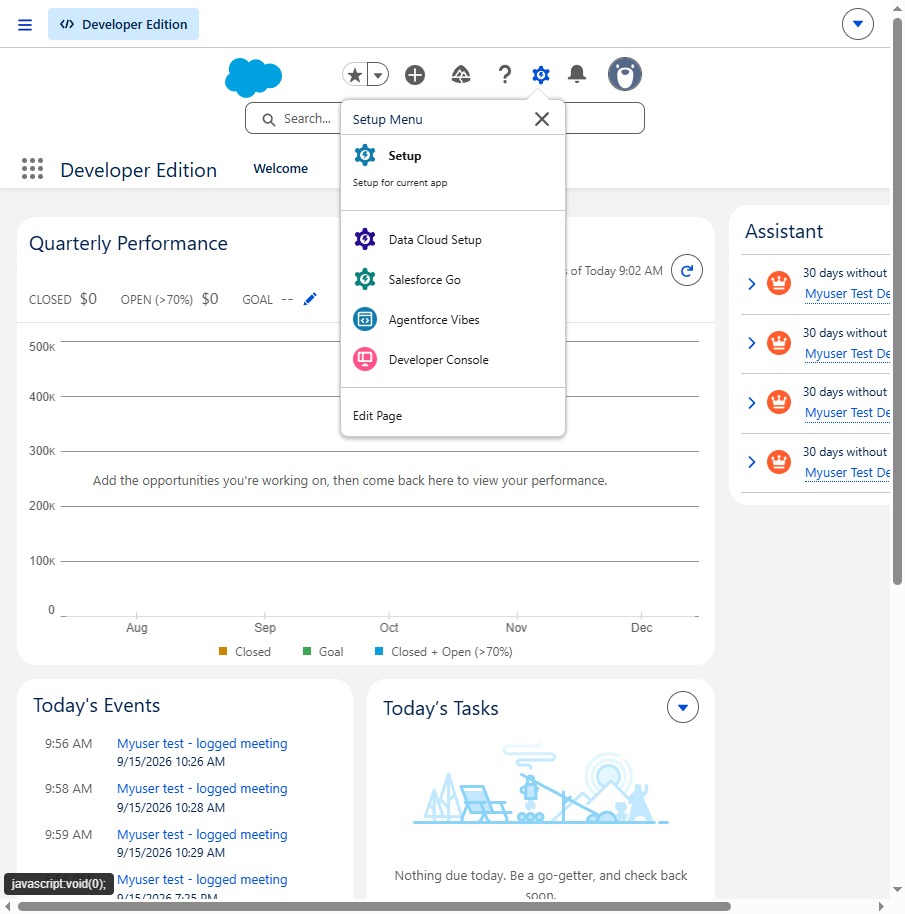
Step 2: Open the External Client App Manager
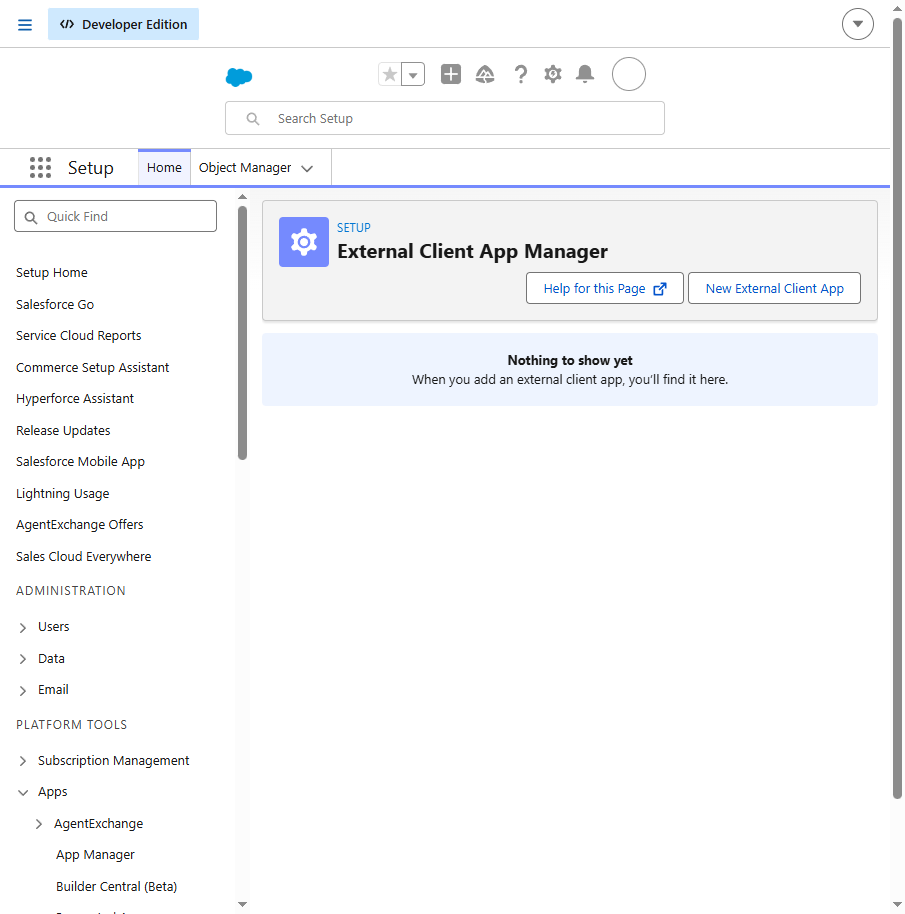
In the Quick Find box on the left, type External Client, then click External Client App Manager (under Apps, External Client Apps).
Click the New External Client App button.
Step 3: Fill in the Basic Information
- External Client App Name: enter Myuser (the API Name fills itself)
- Contact Email: your email address
- Distribution State: keep Local
Step 4: Enable OAuth and Add the API Scope
Scroll down to the section called API (Enable OAuth Settings), expand it, and tick Enable OAuth. A settings panel opens:
- Callback URL: paste
https://login.salesforce.com/services/oauth2/callback - OAuth Scopes: in "Available OAuth Scopes," select
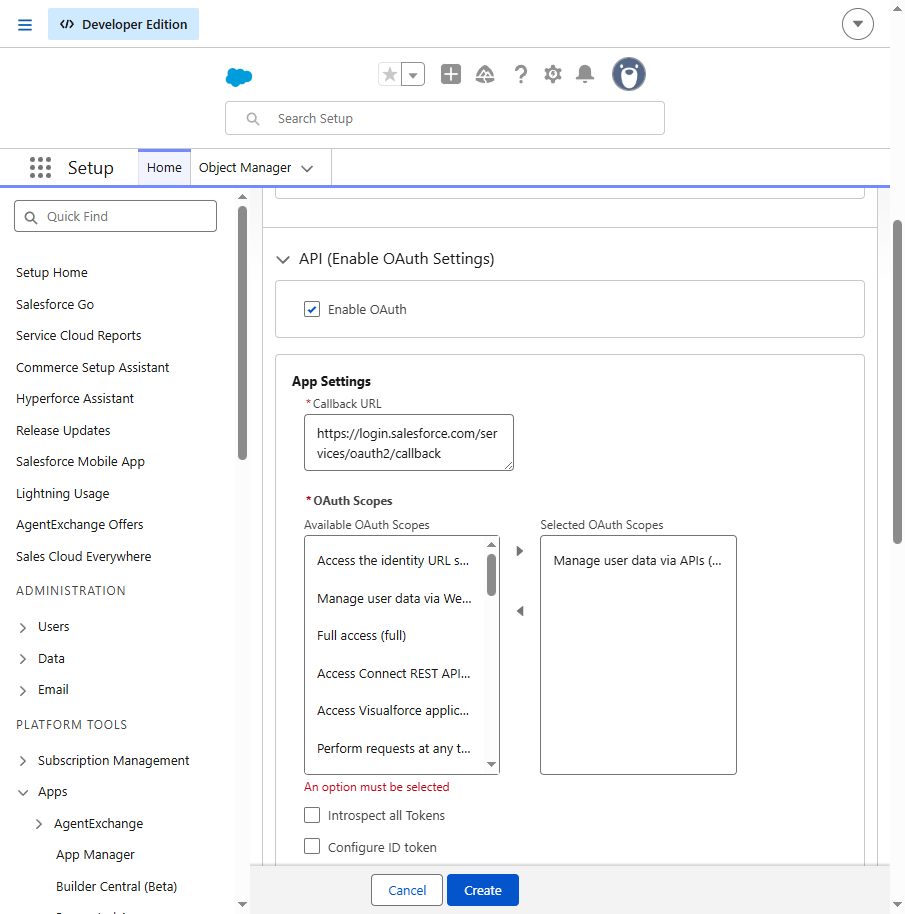
- Under Flow Enablement, tick Enable Client Credentials Flow. Salesforce shows a
- Leave the Security defaults as they are and click Create.
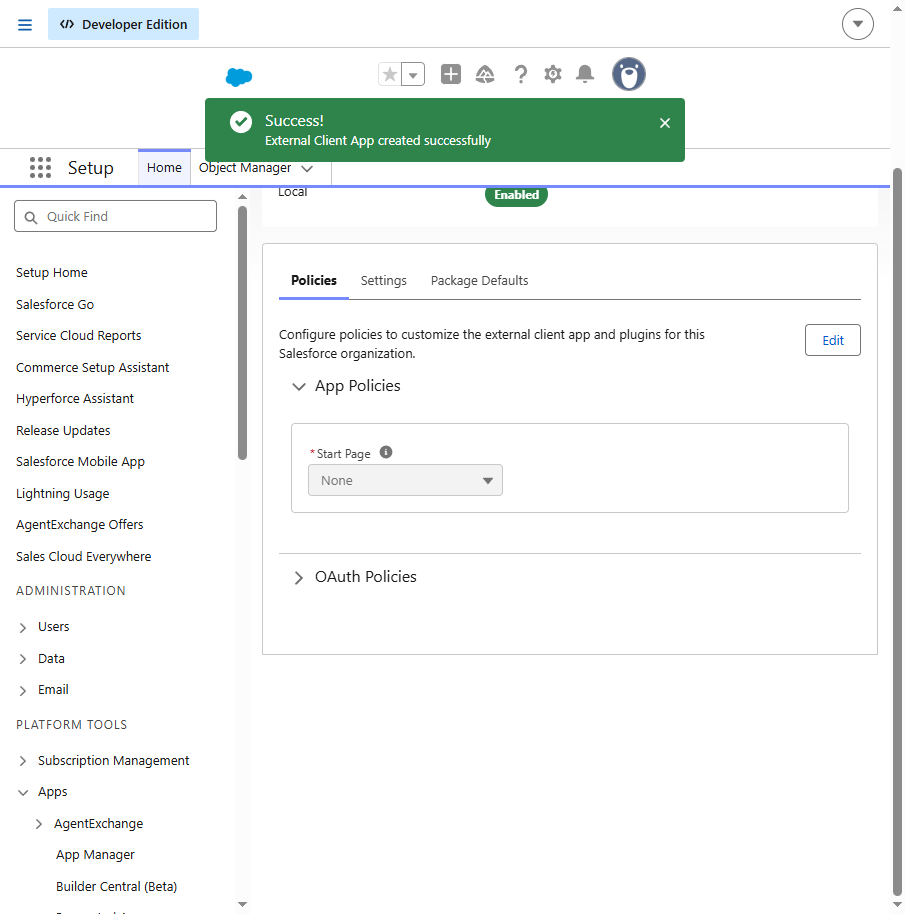
You'll see "External Client App created successfully."
Step 5: Set the Run-As User
This tells Salesforce which user's permissions the integration uses - so it can never see more than you allow.
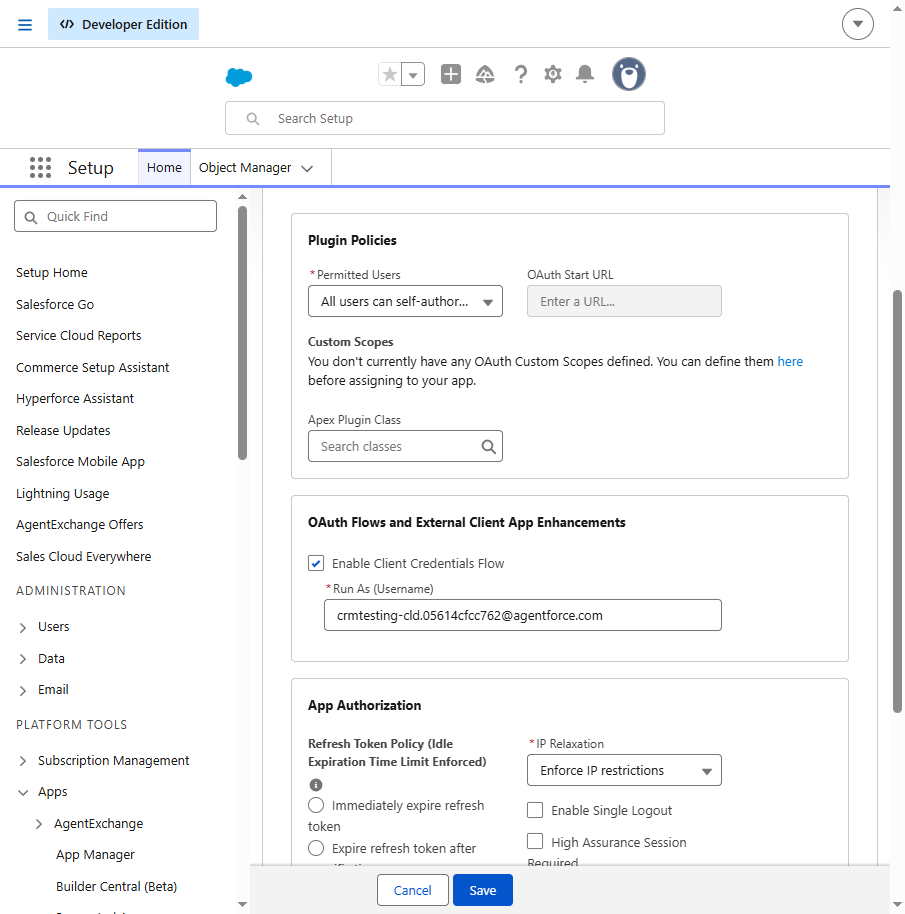
- On your new app's page, stay on the Policies tab and click Edit.
- Expand OAuth Policies.
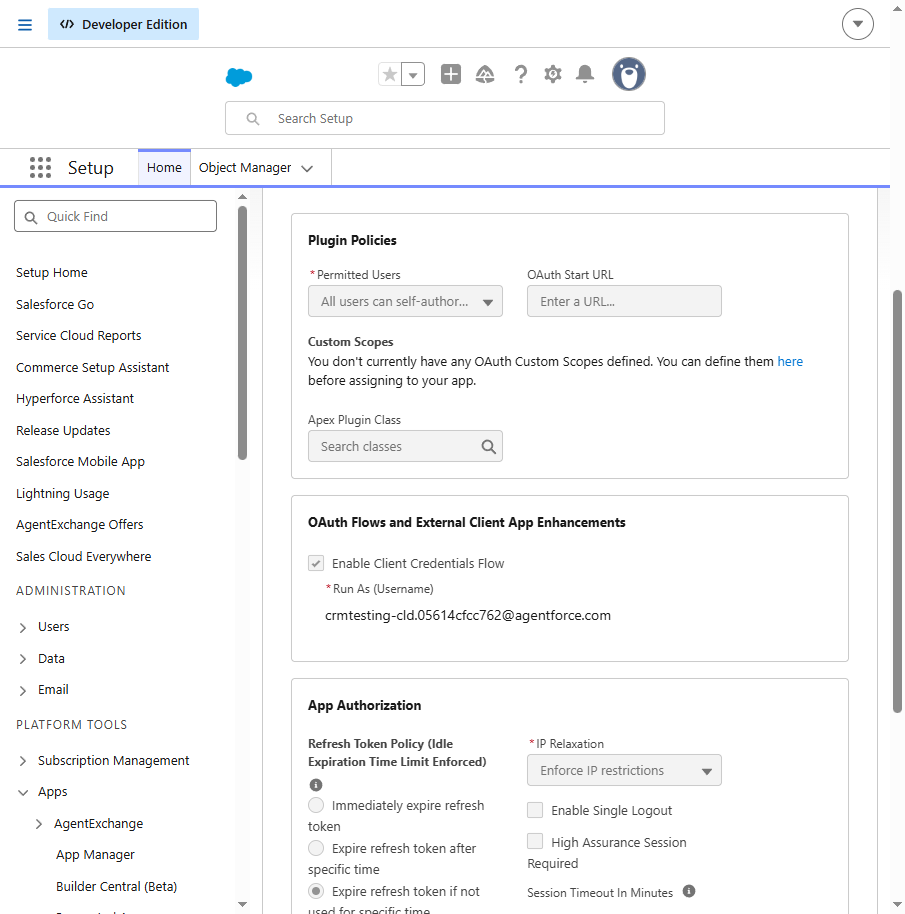
- Tick Enable Client Credentials Flow and, in Run As (Username), enter the
- Click Save.
After saving it looks like this:
Tip for larger teams: create a dedicated "Myuser Integration" user with a permission set that only covers Contacts, Accounts, Opportunities, Tasks, and Events. The integration can then never do more than that user is allowed to.
Step 6: Copy the Consumer Key and Secret
- Switch to the Settings tab of your app and expand OAuth Settings.
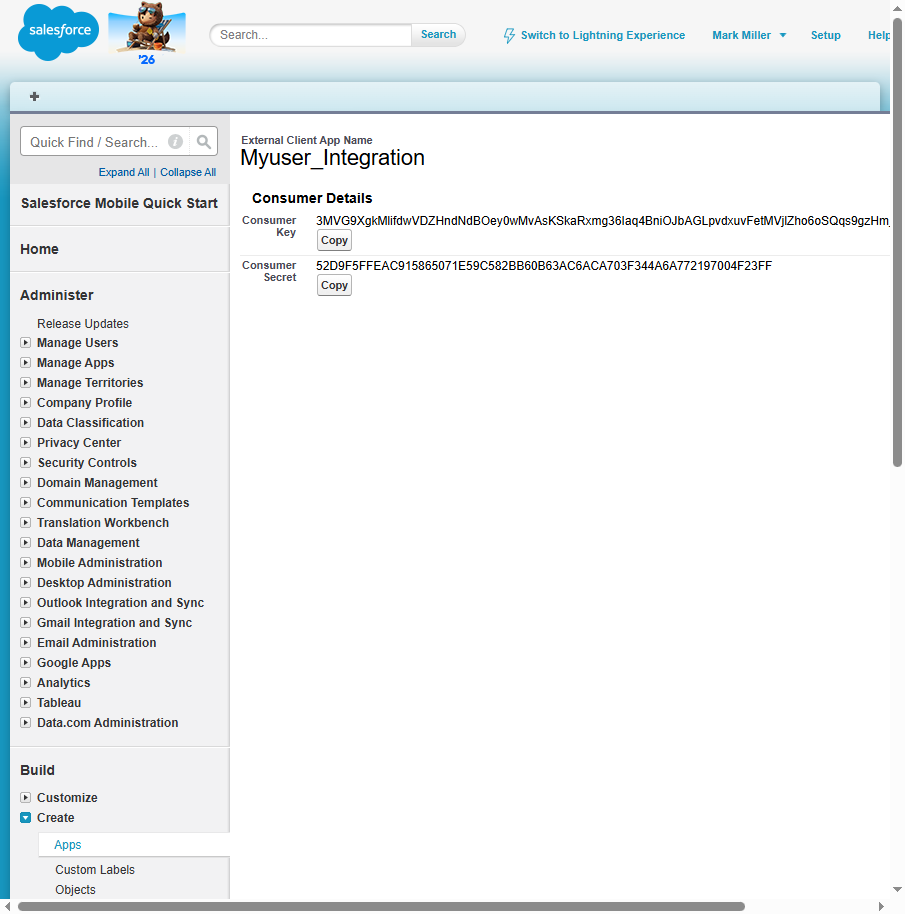
- Click Consumer Key and Secret.
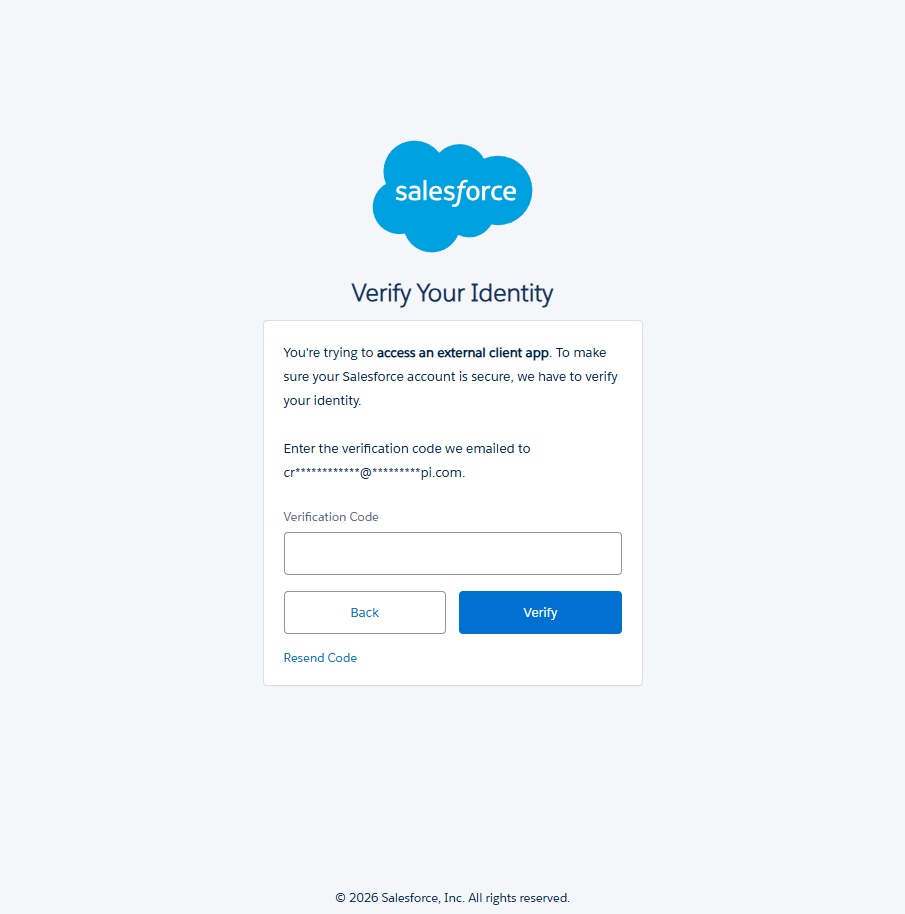
- Salesforce emails you a verification code - enter it when prompted.
- Copy both values: the Consumer Key and the Consumer Secret.
Step 7: Enter the Credentials in the Myuser Dashboard
Finally, navigate to the Myuser dashboard. Under the product you wish to integrate with Salesforce, open the Salesforce integration section and paste:
- Your Salesforce URL - just copy whatever is in your browser's address bar while
- Consumer Key
- Consumer Secret
Then click Save Product Changes.
Congratulations - you're all set! Myuser can now keep your Salesforce up to date automatically: contacts and companies stay in sync without duplicates, every outreach email and booked meeting is logged on the right contact's timeline, and new deals appear in your pipeline.
What Myuser does with this access
Read permissions let us check whether a contact or company already exists so we never create duplicates, and let us read your pipeline stages so deals land in the right place; write permissions let us create and update contacts and companies, log your outreach emails and booked meetings on each contact's timeline, and create deals.
Staying in control
- The connection uses your own Salesforce app - you can see it any time under Setup,
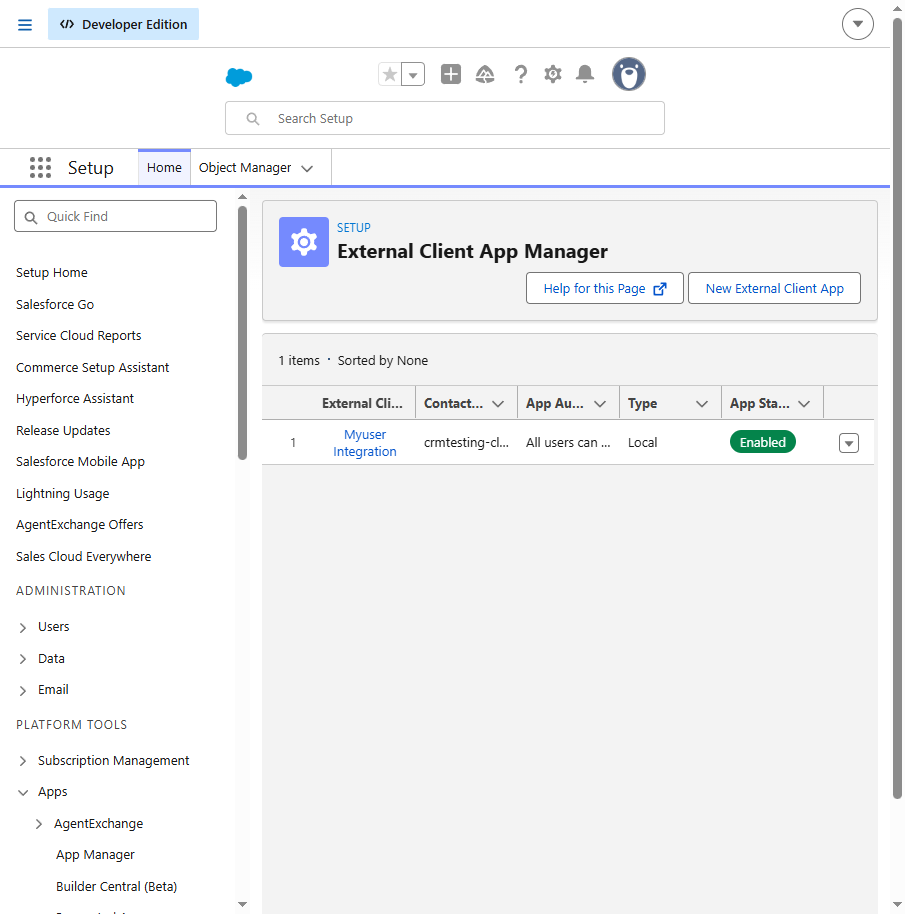
- To pause the integration, open the app and click Disable; to rotate credentials,
- Everything the integration can touch is bounded by the Run-As user's permissions.
Need Help?
If you have any questions or encounter issues during this integration process, please reach out to our support team - we're always here to assist!
Happy Integrating!